Page last updated on 02/13/2021
Home Worth Knowing Frequently Asked Questions Board of Directors
History Seasons at Northface Area Activities/Attractions
Board Approved Modifications and Improvements
The Bottom line:
|
|
Owners need permission to make any change to the exterior of a unit as well as any structural modification (para 5.6 of the By-Laws). Owners efforts can also not impact the common areas to be used by all Northface residents. |
|
|
The listing below are items which the Board of Directors has approved for all Northface owners |
|
|
However, before making one of these approved changes, it is STRONGLY RECOMMENDED you notify management. This is not to obtain approval for the effort (which has already been approved), but to coordinate the installation as it relates to common areas. For remember, any unauthorized change must be corrected at owner expense (Para 5.6 of By-Laws). For example, if you want to install Deck Privacy Walls, that is an easy review as it impacts no common area or structural. The same situation is true if you are installing the approved window and door configuration. But say you want to put in Monitor Heating, this could cause a major issue if you have not coordinated the change with management. Why; lets break it into two parts: |
1) The installation of Monitor heating has been approved - you do not need approval for that
2) But the installation details and location of the fuel tank have not been approved. Fuel tanks by their very nature must be stored in a common area. It is not your decision as to what common area to locate your fuel tank, or to run fuel lines in common areas or others units. Bldgs 3 and 4 have ample storage space in a basement. Bldg 1 has ample space on the far side of the building (hidden from view due to the land contour). But if you were in building 2, it would take some coordination to find a tank location as there is no basement and no remaining ideal space. Can you imagine the "Trailer Park" feel Northface would develop if Bldg 2 fuel tanks were located on the driveway side for all to marvel at when one enters the complex.
Approved Changes
| Date | Modification/Improvement | Requesting Owner | Disposition |
| Nov 1995 | Use of Monitor Heating (Kerosene) as an alternative heating source | Numerous - resolved at Annual Meeting | Approved |
| Mar 2000 | Deck Privacy Walls | Bob Lang (#19) | Approved |
| Jun 2002 | Permanently Installed Air Conditioning | Al Psilopoulos (Unit #7) | Approved |
| Replacement Slider and Windows | Multiple | Approved |
Replacement Slider and Windows
As discussed with the example Pella windows at the Association Meeting, these exact replacement Pella windows and color scheme are approved when installed by Steve Richardson. Any other type window or installer requires Board approval as maintaining a consistent and uniform color scheme on the exterior is critical
-------------------------------------------------------------------------------------------
The use of kerosene heating, via a Monitor Heater, was authorized by the board at the 1995 Association meeting. Installation is at owners expense and involves purchase of an fuel storage tank which is to be located in the basement area of the owners applicable building, or board approved area. From the tank, a fuel line is run, usually through the exterior wall, to the owners unit. To date, all heaters have been installed through Reliable Oil. No other type alternative heating (i.e., Propane) is allowed. Currently 11 or the 40 Units in the Main complex (27%) have Monitor Heating installed
| Building | Unit | Type Unit | Tank Location | Vent location |
| 1 | 01 | End, 1st Floor | Exterior, East side of Building masked by land contour | Front wall |
| 1 | 03 | Middle, 1st Floor | Exterior, East side of Building masked by land contour | Front wall |
| 1 | 08 | End, Second Floor | Exterior, East side of Building masked by land contour | Side wall |
| 2 | 09 | End, 1st Floor | Exterior, West end of bldg below Unit 9 windows | Side wall |
| 2 | 20 | End, 3rd Floor | Exterior, West end of bldg below Unit 9 windows | Side wall |
| 3 | 21 | End, 1st Floor | Interior, Basement common area | Front wall |
| 3 | 24 | End, 3rd Floor | Interior, Basement common area | Front wall |
| 4 | 33 | End, 1st Floor | Interior, Basement common area | Front wall |
| 4 | 34 | Middle, 1st Floor | Interior, Basement common area | Front wall |
| 4 | 35 | Middle, 1st Floor | Interior, Basement common area | Front wall |
| 4 | 38 | Middle 2nd Floor | Interior, Basement common area | Front wall |
-------------------------------------------------------------------------------------------
 |
 |
|
|
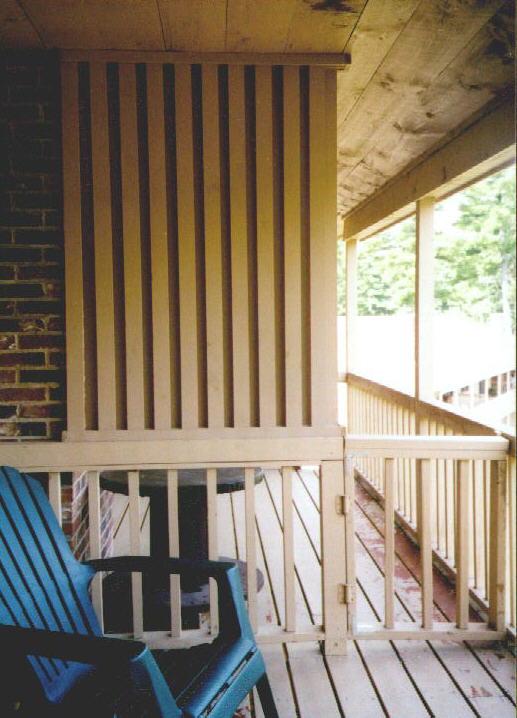
Chimney Side |
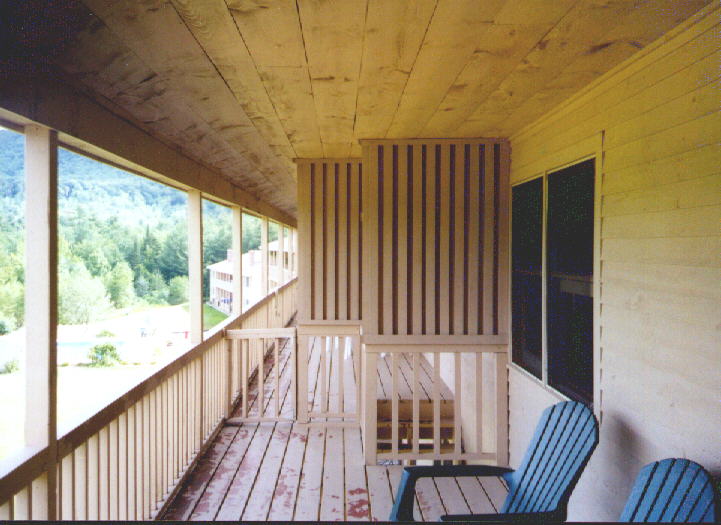
Stairwell Side |
Note: This was the original approved configuration prior to the deck replacement in the mid 2010s. The new configuration is similar in design but used pressure treated 2x6" lumber instead of the original 1x3" slats.
Overview
The walls are constructed as to be aesthetically pleasing yet do not detract from the commonality of the resort. The wall is constructed of 1x3” interspersed lumber which allows air to pass while providing visual privacy. The wall on top of the existing deck dividers. The layout is provided below. Construction plans are provided at attachment 1. The material, in year 2000 dollars, is $71 (chimney side) and $102 (fire escape side). The materials needed and associated costs are provided at attachment 2.
Construction Plans
1. Measure height and length dimensions. Dimensions in drawing should be accurate but may vary from unit to unit (dimensions from 3rd Floor Unit). The dimensions below are for the wall near the chimneys. Dimensions for walls near the fire escapes are given in step 10.
 |
2. Cut wood and paint. If unsure of dimensions, add a few inches to board length and trim at condo.
3. Place 1x2 on center of existing railing. Secure to railing with 4” screws. This will be the bottom anchor for the barrier. Note: Do not screw directly into wood without first pre drilling holes. Drill hole slightly smaller than screw diameter. Since using pine, failure to pre drill might split wood now or in future.
 |
4. Place 1x2 on top (the bottom of the roof) horizontally level with the bottom anchor.
 |
5. Place 1x3 slats on one side. Start at condo end and work out. Use scrap piece of 1x3 to check spacing between slats. Adjust slat placement so that the scrap 1x3 fits snug between the slats. Secure with 2 ¼” screws attached to top and bottom anchors
 |
6. Place 1x3 slats on other side of barrier. Slats should be placed so that they cover the opening left by the slats on the first side. As before, use scrap 1x3 to check spacing between slats.
 |
7. Place 1x2s at top and bottom of barrier (both sides) to cover the screw heads from attaching slats. Attach with 2 ½ ” Screws
 |
8. Place 1x2s at ends of the 1x2s (2 ½ screws) in previous step to provide a finished look
 |
9.
Touch up any spots, which require repainting.
10. For privacy walls near fire escape, employ same construction technique but need to construct two walls as illustrated below:
 |
Materials and cost (Per Wall)
A. Near Fireplace: $71.05
 |
 |
* Can save $ by buying 10' boards and cutting in half (Need only 59”)
** Need 1/3 gallon per wall.
C. Paint: Glidden Evermore House and Trim (Flat) available at Home Depot. Paint mixture listed below
 |
---------------------------------------------------------------------------------------------------------
Permanently Installed Air Conditioning
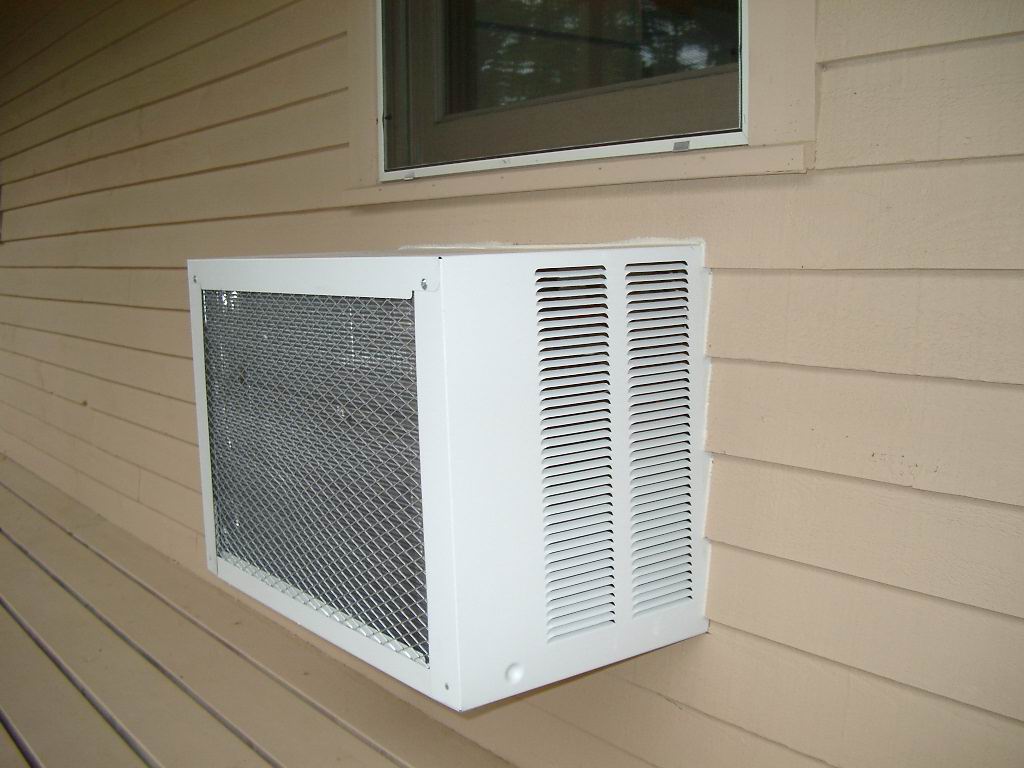
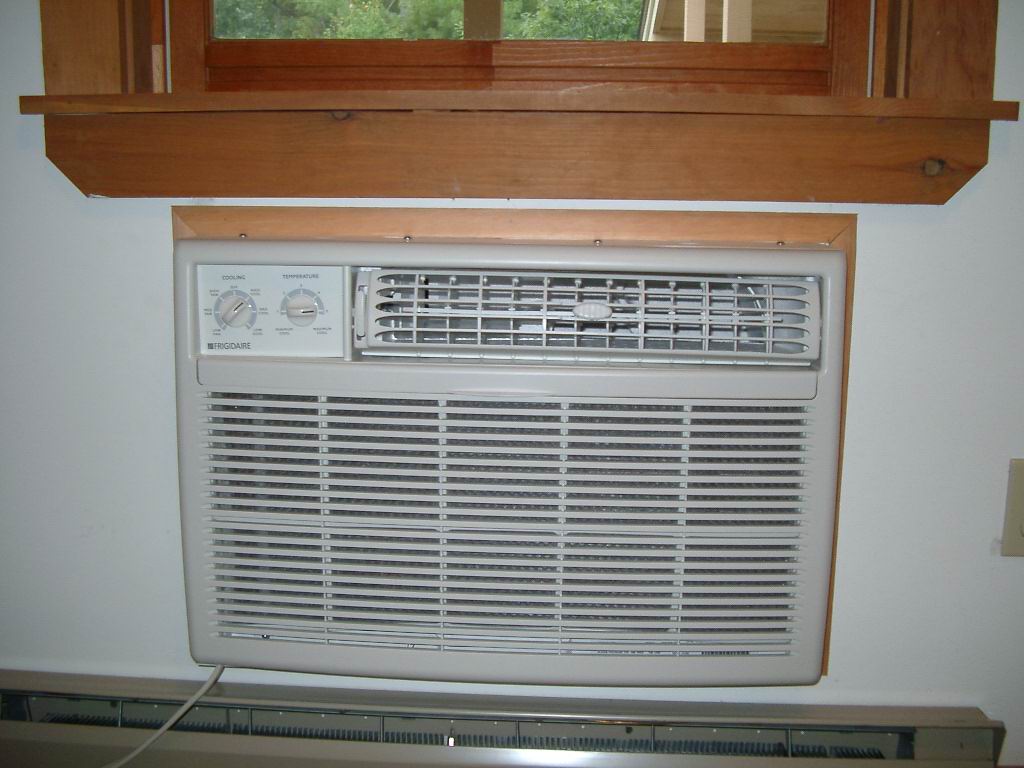
Air Conditioning has been authorized for permanent installation under the kitchen window. Board approval will be granted to any unit owner, upon receipt of the form, provided the owner follow the approved installation configuration shown in the photos below. Installation requires moving an electrical wire which is currently located in the space the air conditioner will be placed.
Currently, there are only a couple units which have this modification. It has been reported that the unit sufficiently cools the entire unit. If you are interested in doing the same, you may wish to contact any unit owner with one for advice. The contractors he used to install the unit are contained under the list of suggested contractors maintained on this web page. The specific air conditioning unit in one unit (installed in 2002) was a Frigidare 15100 BTU which operates on (normal) 115 volt current at 60 hz. The cost was $399.00.
 |
 |
|
Outside view |
Inside View |
Click on photos for enlargement
---------------------------------------------------------------------------------------------------------
Home Worth Knowing Frequently Asked Questions Board of Directors Northface History Seasons at Northface Area Activities/Attractions